The allure of capturing breathtaking aerial footage for documentaries is a dream for many drone pilots. The expansive views, unique perspectives, and ability to tell stories from the sky make aerial filmmaking a powerful tool for creating compelling documentaries. But transitioning from a drone hobbyist or commercial pilot to a documentary aerial filmmaker requires more than just flying skills—it demands a blend of creativity, technical know-how, and strategic planning.
In this guide, we’ll walk you through the essential steps to embark on your journey as a documentary aerial filmmaker. Whether you’re looking to add aerial footage to your next project or aim to specialize in this exciting niche, these steps will set you on the path to success.
Step 1: Master the Art of Drone Cinematography
Before diving into documentary filmmaking, it’s essential to hone your drone cinematography skills. This goes beyond simply capturing footage; it involves understanding shot composition, camera movement, and how to use light and shadow to create a mood.
Study Film Techniques
To truly grasp the art of drone cinematography, immerse yourself in watching documentaries and films that feature significant aerial footage. Analyze how professional filmmakers frame their shots—notice how wide shots are used to establish a location, offering a grand sense of scale, while closer shots bring out details that add depth to the story. Observe how drone movements, like smooth pans or sweeping arcs, are employed to guide the viewer’s attention and create a sense of motion. Understanding how aerial shots interact with ground-level footage will help you craft a more cohesive visual narrative.
Practice Makes Perfect
The key to mastering drone cinematography is practice. Dedicate time to experimenting with various filming techniques. Smooth panning shots can introduce a scene gradually, orbit shots add dynamic interest by revealing different perspectives of a subject, and tracking shots keep your audience engaged by following a moving subject from above. Practice flying at different altitudes and angles, and see how each choice influences the story you’re telling. For example, a low, fast-moving shot can add drama and intensity, while a high, slow-moving shot may evoke calm or contemplation. The more you practice, the more intuitive these choices will become.
Invest in Quality Equipment
Having the right equipment is crucial to producing professional-quality footage. Start with a drone that has a high-quality camera capable of shooting in 4K or higher resolution, ensuring your footage is sharp and detailed. A gimbal is essential for stabilizing your shots, preventing unwanted shake or jitter that can distract from the storytelling. ND filters are another critical investment, allowing you to control exposure in different lighting conditions. They help maintain the correct shutter speed, especially in bright environments, ensuring your footage remains smooth and cinematic. Investing in reliable batteries, extra memory cards, and backup equipment will also keep your shoots running smoothly without technical hiccups.
Combine Creativity with Technical Skills
While mastering the technical aspects of drone cinematography is vital, remember that creativity plays an equally important role. Experiment with unconventional angles or shot sequences to capture footage that stands out. Think about how your shots can evoke emotion—whether it’s the awe of a vast landscape or the tension of a narrow alleyway. By blending creativity with your technical expertise, you’ll develop a unique style that sets your documentary work apart from the rest.
Step 2: Understand Documentary Storytelling
Aerial filmmaking isn’t just about capturing stunning visuals—it’s about using those visuals to tell a powerful story. To be a successful documentary filmmaker, you need to weave your aerial footage into a compelling narrative that resonates with your audience.
Identify Your Story
The foundation of any great documentary is a strong, well-defined story. Start by identifying the core theme or message you want to convey. Whether your focus is on environmental issues, urban development, or historical sites, your aerial footage should serve as a tool to enhance and support that narrative. Consider how aerial shots can provide context, scale, or perspectives that ground-level footage simply cannot capture. For example, a drone shot of a vast deforested area can vividly illustrate environmental degradation, while an overhead view of an ancient city can highlight its historical significance within a broader context.
Research Thoroughly
Solid research is the backbone of any good documentary. Dive deep into your subject matter to ensure your aerial footage contributes meaningfully to the story. Understanding the intricacies of your topic allows you to capture footage that is not only visually compelling but also relevant to the narrative you’re crafting. This research will help you anticipate key moments, identify significant locations, and plan your shots more effectively. For instance, if your documentary focuses on a specific ecosystem, researching the area’s history, wildlife, and current challenges will enable you to film shots that truly reflect its story.
Plan Your Shot List
Once your story is defined and your research is complete, it’s time to plan your shots. Creating a detailed shot list is essential to capturing the footage you need to tell your story visually. Think about the specific shots that will help convey your narrative, and how each one will fit into the overall flow of your film. For instance, you might need wide, sweeping shots of a landscape to establish the setting, followed by more focused shots that highlight specific details or actions relevant to your story. Planning your shot list in advance ensures you capture the footage that will bring your narrative to life.
Consider how each shot will contribute to the overall storytelling arc. Opening with a dramatic aerial shot can set the tone and draw the audience in, while strategically placed aerial footage throughout the documentary can provide transitions, contrasts, or climaxes within your narrative. For example, a high-altitude shot slowly descending into a busy urban area can symbolize the transition from a global issue to a more localized, personal story.
Connect Emotionally with Your Audience
Remember that storytelling is about connection. As you plan your shots, think about how you can evoke emotion and engage your audience. Aerial footage has the unique ability to elicit awe, curiosity, or concern, depending on how it’s framed and presented. Use this to your advantage—whether it’s capturing the majesty of a natural wonder or the devastation of a disaster. Every shot should have a purpose and contribute to the emotional journey of the film.
Adapt and Improvise
While planning is essential, be prepared to adapt and improvise during filming. Documentaries often involve unpredictable elements, and some of the most powerful moments may come from unplanned events or unexpected discoveries. Stay flexible and open to new opportunities that arise during your shoot. Your research and preparation will provide a strong foundation, but being able to think on your feet and adjust your shot list as needed can make all the difference in capturing the essence of your story.
By deeply understanding the principles of documentary storytelling and carefully planning how your aerial footage will contribute to the narrative, you can create a documentary that not only showcases beautiful imagery but also tells a story that resonates with viewers on a deeper level.
Step 3: Plan for Pre-Production and Logistics
Successful documentary filmmaking, particularly with drones, requires meticulous planning during the pre-production phase. This is where you lay the groundwork for a smooth and efficient shoot, ensuring that all logistical elements are in place and potential challenges are anticipated and addressed.
Scout Locations
One of the most critical steps in pre-production is location scouting. Visiting your filming locations ahead of time allows you to assess the terrain, lighting conditions, and any potential obstacles that could impact your drone operations. Take note of natural features like trees, power lines, or bodies of water that might pose risks or limit flight paths. If an on-site visit isn’t possible, use tools like Google Earth and weather apps to get a virtual sense of the area. Pay attention to the best times of day for optimal lighting, and plan your shots accordingly. Scouting also helps you identify unique angles or vantage points that can enhance your aerial storytelling.
Obtain Necessary Permits
Drone regulations vary widely depending on your filming location, and failing to secure the necessary permits can lead to legal complications or fines. In many areas, especially in restricted zones like national parks or near airports, you’ll need special permits to fly your drone. Research the local regulations well in advance of your shoot, and make sure you comply with all legal requirements. If you’re filming in the U.S., ensure you meet FAA Part 107 requirements, which include registering your drone, following airspace restrictions, and obtaining a remote pilot certificate. Keeping your paperwork organized and readily available will help prevent delays on shoot day.
Prepare for Contingencies
Even with the best planning, unforeseen challenges can arise, particularly when it comes to weather. Drones are sensitive to wind, rain, and other adverse conditions, which can limit or completely halt your ability to shoot. Always have a backup plan in place. This could include indoor or ground-level shots that can be filmed if conditions aren’t suitable for flying. Additionally, prepare for technical contingencies—bring extra batteries, memory cards, propellers, and other essential equipment. Losing power or storage space mid-shoot can be frustrating and costly, so having spares on hand is vital to avoid interruptions.
Coordinate with Your Team
Effective communication and coordination with your team during pre-production are crucial for a smooth shoot. Ensure that everyone involved in the project understands the plan, from your shot list to your contingency plans. This includes your drone operator, camera crew, and any other personnel involved in the production. Having a clear schedule and defined roles helps keep the shoot organized and efficient.
Consider Insurance
Insurance is an often-overlooked aspect of drone filmmaking, but it’s essential for protecting yourself and your equipment. Look into drone-specific insurance policies that cover potential damages, accidents, or liability issues that may arise during filming. This is especially important if you’re shooting in populated areas or high-risk environments.
Plan Your Equipment Setup
In addition to carrying spare parts, think about the logistical aspects of your equipment setup. Ensure that you have a safe and secure place to store and transport your drone and accessories. Consider how you’ll manage battery charging on location, especially if you’re filming in remote areas with limited access to power. Portable charging solutions, like power banks or solar chargers, can be lifesavers on long shoots.
Rehearse and Test
Before the actual shoot, rehearse and test your drone operations. This includes testing flight paths, camera settings, and shot compositions. Familiarizing yourself with the location and equipment ahead of time allows you to troubleshoot any issues and refine your techniques, reducing the likelihood of problems on shoot day.
By thoroughly planning for pre-production and logistics, you’ll be better prepared to handle the complexities of documentary drone filmmaking. This foresight ensures that your shoot runs smoothly, allowing you to focus on capturing compelling footage without unnecessary disruptions.
Step 4: Execute Your Shoot with Precision
After all your meticulous planning, it’s time to put your strategy into action and capture your footage. The execution phase is crucial for translating your vision into compelling visuals. Here’s how to ensure a successful shoot with precision and efficiency:
Fly Safely and Strategically
Safety should be your foremost concern during any drone shoot. Before taking off, thoroughly plan your flight paths to avoid obstacles such as trees, buildings, power lines, or other potential hazards. Use a spotter if you’re flying in complex or congested environments to help you navigate and maintain situational awareness. Always adhere to local regulations and best practices for drone operation to minimize risks. While it’s important to stick to your planned shot list, remain adaptable. Sometimes the most captivating footage can come from spontaneous opportunities or unexpected angles. Be prepared to adjust your flight paths or capture additional shots if something intriguing arises during the shoot.
Capture B-Roll Footage
B-roll footage, or supplementary footage, is essential for creating a polished and engaging documentary. While it’s important to focus on your primary shots, make sure to capture plenty of B-roll from various angles and altitudes. B-roll provides additional context and can help smooth transitions between scenes, adding depth and variety to your final edit. For instance, if you’re documenting a natural landscape, capture sweeping shots of the area, close-ups of interesting features, and dynamic angles that showcase the environment from different perspectives. This extra footage can be invaluable in the editing process, allowing you to build a more cohesive and visually rich narrative.
Review Footage Onsite
If time and equipment permit, review your footage on-site before leaving the location. Using a larger screen or a high-quality monitor can help you assess the clarity, composition, and overall quality of your shots. Look for any issues such as focus problems, exposure inconsistencies, or framing errors. If you find any shots that didn’t come out as expected, take the opportunity to reshoot them while you’re still on location. This step can save you time and frustration later in the editing phase, ensuring you have the best possible footage for your documentary.
Communicate with Your Team
Effective communication with your team during the shoot is key to maintaining organization and efficiency. Ensure everyone is aware of their roles and responsibilities, and keep open lines of communication to address any issues or adjustments needed during filming. Coordinate with your crew to ensure smooth operations and to make sure that everyone is aligned with the shoot objectives.
Monitor Equipment Performance
Keep a close eye on your drone’s performance throughout the shoot. Monitor battery levels, signal strength, and camera settings to ensure everything is functioning properly. If you experience any technical issues, address them promptly to avoid interruptions. Regularly check for any potential equipment malfunctions or necessary adjustments, such as recalibrating the drone or adjusting camera settings to adapt to changing light conditions.
Capture Unique Perspectives
While sticking to your shot list is important, also look for opportunities to capture unique perspectives that can add a distinctive touch to your documentary. Experiment with creative angles, unusual flight paths, or dynamic movements that can offer fresh and engaging visuals. These unique shots can set your documentary apart and provide a more captivating viewing experience.
Stay Organized
Maintain a well-organized approach to managing your footage and equipment. Label and catalog your shots as you go to make the editing process smoother. Keep track of which shots have been captured and which still need to be filmed, ensuring that you don’t miss any critical elements of your story.
By executing your shoot with precision and attention to detail, you’ll be able to capture high-quality footage that aligns with your documentary’s vision and narrative. Being well-prepared and adaptable during the filming process will help you achieve the best possible results and contribute to a compelling and professionally crafted final product.
Step 5: Edit with an Eye for Storytelling
Post-production is where your documentary truly takes shape. Editing is more than just assembling clips—it’s about crafting a cohesive and engaging narrative that resonates with your audience. Here’s how to approach the editing process to ensure your story is compelling and visually unified:
Organize Your Footage
Begin by organizing your footage to streamline the editing process. Create folders based on different categories such as shot types (e.g., wide shots, close-ups), locations, or specific sequences. This methodical approach helps you quickly locate and access the clips you need, reducing time spent searching for footage and minimizing the risk of overlooking important shots. Label each clip clearly and consider using metadata to keep track of details like take numbers or special notes about each shot. Proper organization at this stage will lay a solid foundation for a more efficient and focused editing workflow.
Focus on Flow and Pacing
Aerial shots offer stunning visuals, but their impact is maximized when they serve the story effectively. When editing, focus on creating a seamless flow and balanced pacing that supports your narrative. Integrate aerial footage strategically to highlight key moments or transitions in the story. For example, use wide aerial shots to establish a setting or provide context, then transition to closer shots for personal or detailed moments. Ensure that the aerial footage complements interviews, ground-level shots, and other elements, contributing to the overall rhythm of the documentary. Pay attention to how the pacing of the aerial shots affects the viewer’s engagement and adjust as needed to maintain a compelling narrative flow.
Color Grade for Consistency
Color grading is essential for creating a visually cohesive documentary. Ensure that your aerial footage matches the tone and color palette of the rest of your film. Inconsistent color grading can be jarring and disrupt the viewer’s immersion. Use color grading to enhance the mood and atmosphere of your documentary, whether you’re aiming for a dramatic, high-contrast look or a natural, subdued tone. Adjust the exposure, contrast, and saturation to ensure that the aerial footage blends seamlessly with other visual elements. Consistent color grading helps to maintain a unified aesthetic and reinforces the emotional impact of your story.
Integrate Sound Design
Sound design plays a crucial role in enhancing the storytelling of your documentary. Incorporate ambient sounds, music, and voiceovers to complement your visuals and create a richer viewing experience. Aerial footage can benefit from background sounds that reflect the environment, such as wind, waves, or city noise, which add authenticity and immersion. Use music strategically to underscore key moments and reinforce the emotional tone of your documentary. Ensure that the audio elements are well-balanced and synchronized with the visuals to maintain clarity and impact.
Craft a Strong Narrative Structure
As you piece together your footage, focus on crafting a strong narrative structure that guides the viewer through your story. Create a clear beginning, middle, and end, with a logical progression that keeps the audience engaged. Use your aerial shots to enhance pivotal moments and transitions, helping to tell the story in a way that is visually and emotionally compelling. Consider employing techniques such as montages or overlays to highlight significant themes or connections between different elements of your narrative.
Review and Refine
After completing a rough cut of your documentary, review it critically to identify areas for improvement. Seek feedback from colleagues or test audiences to gain fresh perspectives. Pay attention to pacing, coherence, and overall impact, and make necessary adjustments to refine the final edit. Revisiting your footage with a critical eye ensures that every element serves the story effectively and contributes to a polished, professional final product.
Export and Finalize
Once you’re satisfied with the edit, export your documentary in the appropriate format and resolution for your intended distribution channels. Ensure that your final export meets technical specifications and quality standards. Double-check for any errors or inconsistencies before finalizing and preparing your documentary for release.
By focusing on storytelling through thoughtful editing, you can transform your footage into a compelling documentary that captivates your audience and conveys your message with impact.
Conclusion: The Takeaway
Transitioning from a drone pilot to a documentary aerial filmmaker is a challenging yet rewarding journey. By mastering cinematography, understanding storytelling, and planning meticulously, you can create compelling documentaries that captivate audiences. Remember, it’s not just about the technology—it’s about using that technology to tell powerful stories. Start small, keep practicing, and refine your craft with each project. With patience and persistence, you can carve out a niche for yourself in the exciting world of documentary aerial filmmaking.
Now, take your drone, map out your story, and start capturing the world from a new perspective. The sky is literally the limit!
If you have any questions, let us know! If you’d like to hire us, you can get more information here.
Written by: Tony Marino, MBA – FAA Certified Part 107 Commercial Drone Pilot and Chief Business Strategist at Aerial Northwest
Disclaimer: The information provided in this blog post is for general informational purposes only and should not be construed as legal advice.
Resources
- FAA Resources: FAA DroneZone
- Article: Drone Pilot Aerial Photography Business Plan Blueprint 2024
- Article: Top 5 Drone Pilot Marketing Channels for 2024
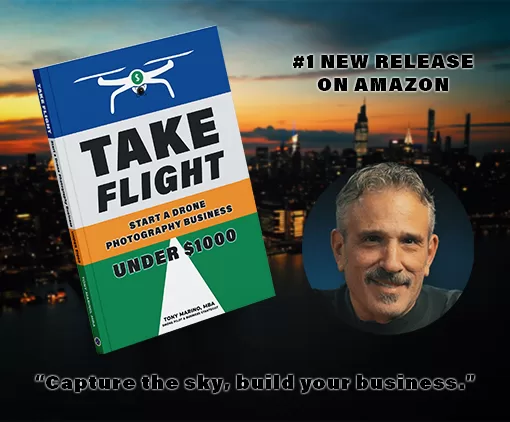
Starting Your Own Drone Service Business
Pick up your copy today on Amazon and wherever fine books are sold.

DRONE BUSINESS STRATEGY MAGAZINE
A free digital publication made exclusively for all small business drone pilots to them help start-up, become profitable while sustaining a competitive advantage within the drone service industry sector they opt to serve.
“If you love to fly, we’d love to have you come aboard!”
We share your information with no one. Our Privacy Policy.


Leave a Reply
Your email is always safe with us.