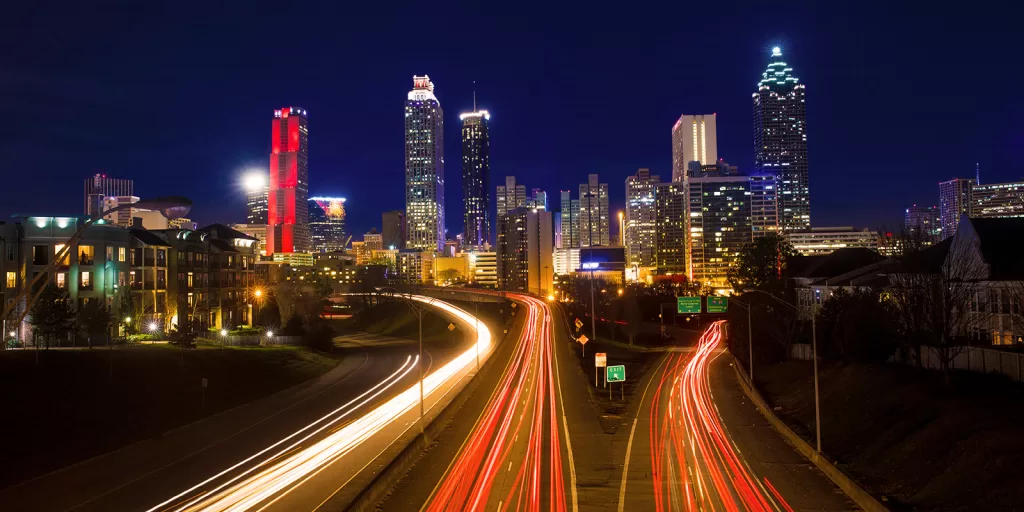
Aerial hyperlapse photography has revolutionized the way we capture and experience the world from above. With the help of drones, photographers and videographers can create stunning time-lapse videos that showcase the beauty and dynamism of both natural and urban landscapes. In this article, we will explore the art of capturing aerial hyperlapse photography using a drone and discuss the techniques, equipment, and considerations involved in creating impressive hyperlapse videos.
What is Aerial Hyperlapse Photography?
Aerial hyperlapse photography combines the concept of time-lapse photography with the unique perspective offered by drones. It involves capturing a series of images or video frames at regular intervals while the drone is in motion. These frames are then stitched together to create a seamless video that compresses time and highlights the motion of the subject and the surroundings.
Benefits of Using a Drone for Aerial Hyperlapse Photography
Using a drone for aerial hyperlapse photography offers several advantages. Firstly, it allows photographers to access elevated vantage points that were previously inaccessible or required expensive equipment. Drones can fly at different altitudes and angles, providing a versatile range of perspectives for capturing hyperlapse footage.
Additionally, drones offer stability and precision in flight, ensuring smooth and shake-free footage. They can also navigate through challenging terrains and capture footage in various weather conditions, providing flexibility and adaptability for photographers.
Differences Between Hyperlapse and Time-Lapse Photography
While both hyperlapse and time-lapse photography involve capturing a series of images or frames over a period of time, there are distinct differences between the two techniques. Understanding these differences will help you choose the right approach for your creative vision. Let’s explore the dissimilarities between hyperlapse and time-lapse photography:
- Definition: Time-lapse photography is the technique of capturing a series of still images at set intervals and then playing them back as a fast-motion video, creating the illusion of time moving quickly. On the other hand, hyperlapse photography is a variation of time-lapse photography that involves capturing the frames while the camera is in motion, resulting in a dynamic video showcasing movement through space.
- Camera Movement: In time-lapse photography, the camera is typically stationary throughout the entire sequence. It captures the changing scenes or subjects from a fixed perspective. In hyperlapse photography, the camera moves incrementally between each frame, creating a sense of motion and providing a unique perspective as the surroundings change.
- Subject Perspective: Time-lapse photography often focuses on capturing changes in lighting, weather, or the growth and movement of natural phenomena over an extended period. It offers a broader view of a scene with minimal camera movement. In hyperlapse photography, the camera movement becomes an integral part of the visual narrative. It allows for a more immersive experience, showcasing the subject from different angles and perspectives.
- Complexity and Planning: Hyperlapse photography requires more planning and precision compared to time-lapse photography. The camera movement must be carefully executed to maintain smooth motion between frames while covering a significant distance. Time-lapse photography, on the other hand, requires less movement coordination since the camera remains stationary.
- Equipment and Techniques: Both time-lapse and hyperlapse photography require similar equipment, such as a camera and tripod. However, hyperlapse photography often involves additional equipment like a gimbal or stabilizer to ensure smooth camera movement during the capture process. The techniques used in hyperlapse photography include manually moving the camera between frames or utilizing motorized sliders or drones for controlled movement.
- Final Output: The final output of time-lapse photography is a fast-motion video that compresses hours, days, or even months into a shorter duration, typically ranging from a few seconds to a few minutes. Hyperlapse photography, on the other hand, produces a video that showcases the passage of time and movement through space, creating a visually captivating experience for the viewer.
Understanding the distinctions between hyperlapse and time-lapse photography will help you decide which technique aligns best with your creative goals. Both approaches offer unique ways to capture and present the passage of time, allowing you to create stunning visual narratives that engage and captivate your audience.
Choosing the Right Drone for Aerial Hyperlapse Photography
When selecting a drone for aerial hyperlapse photography, there are a few key factors to consider. Firstly, the drone should have a reliable and stable flight performance to ensure smooth footage. Look for drones with advanced stabilization features such as gimbal systems, which help eliminate vibrations and jitters.
Battery life is another crucial consideration. Longer flight times allow for more extended hyperlapse sequences without interruptions. Additionally, consider the drone’s camera capabilities, such as resolution, frame rate, and dynamic range, as these factors contribute to the overall quality of the footage.
Essential Equipment for Aerial Hyperlapse Photography
In addition to a suitable drone, there are several essential pieces of equipment that can enhance your aerial hyperlapse photography experience. These include:
- Camera Filters: Neutral density (ND) filters are vital for balancing exposure and achieving cinematic effects. They reduce the amount of light entering the camera, allowing you to use slower shutter speeds and create motion blur.
- Extra Batteries: Carrying spare batteries ensures that you have sufficient power for longer hyperlapse sequences and multiple shooting sessions.
- Memory Cards: High-capacity memory cards with fast write speeds are necessary to store the large amount of data generated by aerial hyperlapse photography.
- Remote Controller: A reliable remote controller with a comfortable grip and intuitive controls enables precise maneuvering and framing of shots.
Preparing for the Aerial Shoot
Before starting your aerial hyperlapse shoot, it is essential to plan and prepare accordingly. Here are a few key steps to follow:
- Scouting Locations: Research and identify locations that offer visually appealing landscapes or interesting subjects for your hyperlapse video.
- Weather Conditions: Keep an eye on weather forecasts to choose days with favorable conditions for your shoot. Avoid windy or rainy days that can impact drone stability and image quality.
- Flight Permissions: Check local regulations and obtain any necessary permits or permissions required for flying drones in the selected locations.
Capturing Aerial Hyperlapse Photography
To capture compelling aerial hyperlapse footage, follow these steps:
- Composition and Framing: Consider the rule of thirds and other composition techniques to create visually pleasing shots. Experiment with different angles and altitudes to add depth and variety to your hyperlapse.
- Interval Settings: Set the interval between each photo or frame capture based on the desired speed of the final hyperlapse video. A shorter interval will result in faster motion, while a longer interval will create a slower-paced video.
- Smooth Flight Movements: Fly the drone smoothly and steadily, avoiding abrupt changes in direction or altitude. Slow and controlled movements ensure a seamless transition between frames and contribute to the overall smoothness of the hyperlapse.
Techniques for Creating Smooth Hyperlapse Videos
To achieve smooth hyperlapse videos, consider the following techniques:
- Manual Control: Instead of relying solely on automated flight modes, practice manual control to have more precise and intentional movements during the shoot.
- Slow and Steady Movements: Maintain a consistent speed throughout the flight, avoiding sudden accelerations or decelerations. Gradual and gentle movements help create smoother hyperlapse sequences.
Post-Processing and Editing
After capturing the aerial hyperlapse footage, it’s time to bring it to life through post-processing and editing. Consider these steps:
- Import and Organize: Transfer the captured footage to your computer and organize it in a dedicated folder for easy access.
- Stabilization: Use video editing software with stabilization capabilities to further enhance the smoothness of the hyperlapse. This step can help reduce any residual shakes or vibrations.
Showcasing Your Aerial Hyperlapse Photography
Once you have edited your hyperlapse video, it’s time to share your work with the world. Consider the following methods for showcasing your aerial hyperlapse photography:
- Social Media: Platforms like Instagram, YouTube, and Facebook offer a wide reach for sharing your hyperlapse videos. Craft engaging captions and use appropriate hashtags to attract your target audience.
- Personal Website or Portfolio: Create a dedicated section on your website or online portfolio to showcase your best aerial hyperlapse photography. Include brief descriptions and technical details for each video to provide context and insights.
Safety Considerations
Safety should always be a top priority when flying drones for aerial hyperlapse photography. Follow these safety guidelines:
- Observe Flight Restrictions: Familiarize yourself with local regulations and respect any airspace restrictions or no-fly zones. Flying in prohibited areas can lead to accidents or legal consequences.
- Check Weather Conditions: Avoid flying in adverse weather conditions, such as strong winds or heavy rain. These conditions can affect the stability and control of your drone.
Legal Regulations and Permissions
Before flying a drone for aerial hyperlapse photography, make sure to comply with local regulations. Familiarize yourself with the legal requirements and obtain any necessary permits or permissions for drone usage in your area. Failure to do so can result in fines or legal consequences.
Inspiration and Creative Ideas
To enhance your creativity and find inspiration for your aerial hyperlapse photography, consider the following ideas:
- Change of Perspectives: Experiment with different altitudes and angles to capture unique and dynamic shots. Fly low to the ground for dramatic effects or high above for a wider view.
- Combine Hyperlapse with Other Techniques: Blend aerial hyperlapse with other techniques like slow-motion footage, panoramic shots, or even hyperlapse transitions between ground and aerial perspectives.
The Takeaway
Aerial hyperlapse photography using drones provides an exciting opportunity to capture breathtaking time-lapse videos from unique vantage points. By carefully selecting the right equipment, planning your shoots, and mastering the necessary techniques, you can create stunning hyperlapse videos that showcase the beauty and motion of the world from above.
Be smart, safe, and forever fly!
If you have any questions, let us know! If you’d like to hire us, you can get more information here.
Written by: Tony Marino, MBA – FAA Certified Part 107 Commercial Drone Pilot and Chief Business Strategist at Aerial Northwest
Frequently Asked Questions
Q1. Can I create hyperlapse videos with any drone?
Yes, you can create hyperlapse videos with various types of drones. However, drones with stable flight performance, good camera capabilities, and reliable stabilization features are recommended for smoother and high-quality results.
Q2. What software can I use for post-processing and editing my hyperlapse videos?
Popular video editing software like Adobe Premiere Pro, Final Cut Pro, and DaVinci Resolve offer comprehensive tools for post-processing and editing hyperlapse videos. You can stabilize footage, adjust colors, add transitions, and export the final video in the desired format.
Q3. How long does it take to create an aerial hyperlapse video?
The time required to create an aerial hyperlapse video depends on various factors, including the length of the final video, the desired speed, the number of frames captured, and the complexity of the editing process. It can range from a few hours to several days.
Q4. Can I use hyperlapse footage for commercial purposes?
Using hyperlapse footage for commercial purposes may require additional licenses or permissions, depending on the intended usage. It’s important to understand and comply with copyright laws and any applicable regulations in your region.
Q5. Are there any safety precautions I should take when flying a drone for aerial hyperlapse photography?
Yes, safety is paramount when flying drones. Ensure you are familiar with the drone’s user manual, follow local regulations, perform pre-flight checks, and fly in safe areas away from people, buildings, and obstacles. Always maintain visual contact with your drone and be mindful of weather conditions.
Disclaimer: The information provided in this blog post is for general informational purposes only and should not be construed as legal advice.

DRONE BUSINESS STRATEGY MAGAZINE
A free digital publication made exclusively for all small business drone pilots to them help start-up, become profitable while sustaining a competitive advantage within the drone service industry sector they opt to serve.
“If you love to fly, we’d love to have you come aboard!”
We share your information with no one. Our Privacy Policy.


Leave a Reply
Your email is always safe with us.